

Are you tired of those annoying temperature fluctuations while showering? Installing a thermostatic mixer shower might be the solution you’ve been searching for. This guide will take you through the installation process step by step, ensuring a seamless transition to a more comfortable and consistent showering experience.
Understanding the Basics of a Thermostatic Mixer Shower
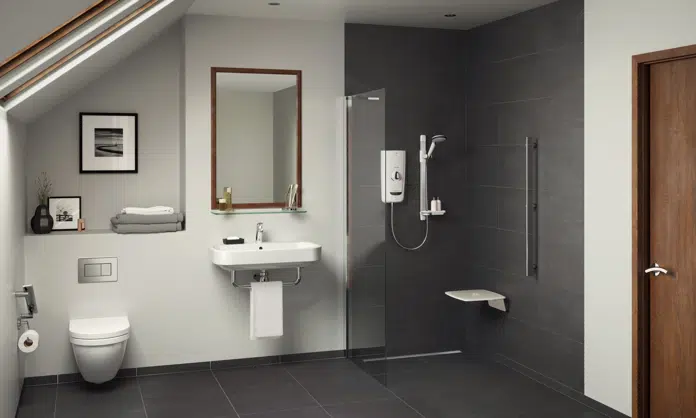
Before you get started, it’s crucial to understand what a thermostatic mixer shower is. Unlike traditional shower systems, these mixers maintain a constant water temperature by automatically adjusting the flow of hot and cold water. This means no more sudden bursts of cold water or scalding hot surprises.
The beauty of thermostatic mixers lies in their simplicity and ease of use. They are perfect for families, especially those with young children or elderly members, ensuring a safe and pleasant shower experience for everyone. Now, let’s get into the nitty-gritty of how to install one yourself.
Gather Your Tools and Materials
Preparation is key. To install your thermostatic mixer shower, you’ll need a few essential tools and materials:
- Thermostatic mixer valve
- Showerhead and hose
- Adjustable wrench
- Pipe cutter
- Drill and appropriate drill bits
- Screwdriver
- Teflon tape
- Wall anchors
- Level
- Measuring tape
Having everything on hand before you start will make the process much smoother and help prevent unnecessary delays.
Choosing the Perfect Location
Selecting the right spot for your thermostatic mixer shower is crucial. Ensure you pick a place that’s easily accessible and convenient for everyone in the household. Ideally, it should be located at a comfortable height and within reach of other shower controls.
Make sure to also consider the proximity to existing plumbing lines. This will simplify the installation process and reduce the need for extensive modifications.
Shutting Off the Water Supply
Before you begin any installation work, it’s vital to shut off the water supply to your shower. Locate the main water valve in your home and turn it off. This step is crucial to avoid any accidents or flooding during the installation process.
Once the water supply is off, open the shower taps to drain any remaining water from the pipes. This will ensure a dry working environment and make the installation process much easier.
Removing the Old Shower Fittings
With the water supply shut off, it’s time to remove the old shower fittings. Start by carefully unscrewing the existing showerhead and hose. If there are any stubborn fittings, use an adjustable wrench to loosen them.
Next, remove the old shower valve. This may involve cutting away some of the existing plumbing, so be sure to use a pipe cutter for clean and precise cuts. Take care not to damage any surrounding tiles or walls during this process.
Preparing the Wall for Installation
Now that the old fittings are removed, it’s time to prepare the wall for your new thermostatic mixer shower. Use a drill to create holes for the wall anchors that will hold the mixer valve in place. Make sure to use the appropriate drill bits to match the size of the wall anchors.
Insert the wall anchors into the drilled holes and ensure they are securely in place. This will provide a stable and sturdy foundation for your new shower system.
Fitting the Thermostatic Mixer Valve
With the wall prepared, it’s time to fit the thermostatic mixer valve. Align the valve with the wall anchors and use screws to secure it in place. Make sure the valve is level and properly aligned with the shower area.
Once the valve is securely fitted, connect the hot and cold water supply lines to the appropriate inlets on the valve. Use Teflon tape on the threads to ensure a watertight seal. Tighten the connections with an adjustable wrench, but be careful not to over-tighten and damage the fittings.
Installing the Showerhead and Hose
With the mixer valve in place, it’s time to install the showerhead and hose. Attach the showerhead to the hose and then connect the hose to the outlet on the mixer valve. Make sure all connections are tight and secure to prevent any leaks.
Take a moment to check the alignment and positioning of the showerhead. Adjust as necessary to ensure it is at a comfortable height and angle for use.
Testing the Water Temperature
Before you finish up, it’s crucial to test the water temperature to ensure your new thermostatic mixer shower is working correctly. Turn the main water supply back on and gradually open the shower valve.
Allow the water to flow for a few minutes and check the temperature. The thermostatic mixer should maintain a constant temperature without any fluctuations. If you notice any issues, double-check the connections and make any necessary adjustments.
Sealing the Surrounding Area
Once you’re satisfied with the water temperature, it’s time to seal the surrounding area to prevent any water damage. Use a high-quality silicone sealant to seal around the edges of the mixer valve and any other openings.
Apply the sealant evenly and smoothly, ensuring a watertight seal. This step is crucial to protect your walls and tiles from water infiltration and potential damage.
Final Adjustments and Cleaning Up
With the installation complete, take a moment to make any final adjustments to the showerhead and hose. Ensure everything is securely in place and properly aligned.
Clean up any debris or dust from the installation process and give the area a good wipe down. This will leave your new thermostatic mixer shower looking clean and ready for use.
Enjoying Your New Shower Experience
Congratulations! You’ve successfully installed your new thermostatic mixer shower. Take a moment to enjoy the fruits of your labor and revel in the consistent and comfortable shower experience.
Remember, regular maintenance and cleaning will help keep your shower in top condition and ensure it continues to function optimally.
Troubleshooting Common Issues
While the installation process is straightforward, you may encounter some common issues along the way. Here are a few troubleshooting tips:
- Leaks: If you notice any leaks, double-check the connections and ensure they are tight and properly sealed.
- Fluctuating Temperature: If the water temperature fluctuates, check the water supply lines and ensure they are connected correctly.
- Low Water Pressure: If you experience low water pressure, check for any blockages in the showerhead or hose and clean them if necessary.
By addressing these common issues, you can ensure your thermostatic mixer shower operates smoothly and efficiently.
Conclusion
Installing a thermostatic mixer shower is a rewarding DIY project that can significantly enhance your showering experience. By following this step-by-step guide, you can achieve a consistent and comfortable water temperature, making your daily showers more enjoyable.
If you have any questions or need further assistance, don’t hesitate to reach out to a professional plumber or consult the manufacturer’s instructions. Enjoy your new shower and the benefits it brings to your home!